Looking for original DIY Halloween decorations for your home or yard? The creative web is overflowing with them! To give you a head start, I went hunting for the prettiest (and spookiest) handmade ideas out there this season, from painted wooden ghosts to window drawings. Most use inexpensive supplies you may already have, and many are easy enough to make with kids. For more seasonal inspiration, browse my Halloween decor ideas.
Inside the house, on the front door, in the windows: below you’ll find 16 projects, each with a short description and a link to the original tutorial so you can follow the creator’s full instructions. I’ve also added my own practical tips on materials, safety and crafting with kids at the end, plus a simple schedule to finish on time. If you love making things yourself, my DIY projects section has plenty more. Take a look and tell me which ones you like best!
Contents
1. How to haunt every room with ghosts, bats and lanterns
2. Front door ideas to greet trick-or-treaters
3. Why window silhouettes and drawings look so good at night
4. Spooky or cute? How to choose your Halloween style
5. Practical tips for your DIY Halloween decor
How to haunt every room with ghosts, bats and lanterns
Let’s start with my favorite DIY ideas for decorating indoors. Wooden ghosts, a bat bouquet, ghost piñatas… these projects are easy to recreate, and most of them use simple supplies you may already have at home.
A tip before you start: pick a color palette. Classic black and orange is always a hit, but black and white feels more modern, and pastels or rainbow colors make Halloween fun rather than frightening for younger kids.
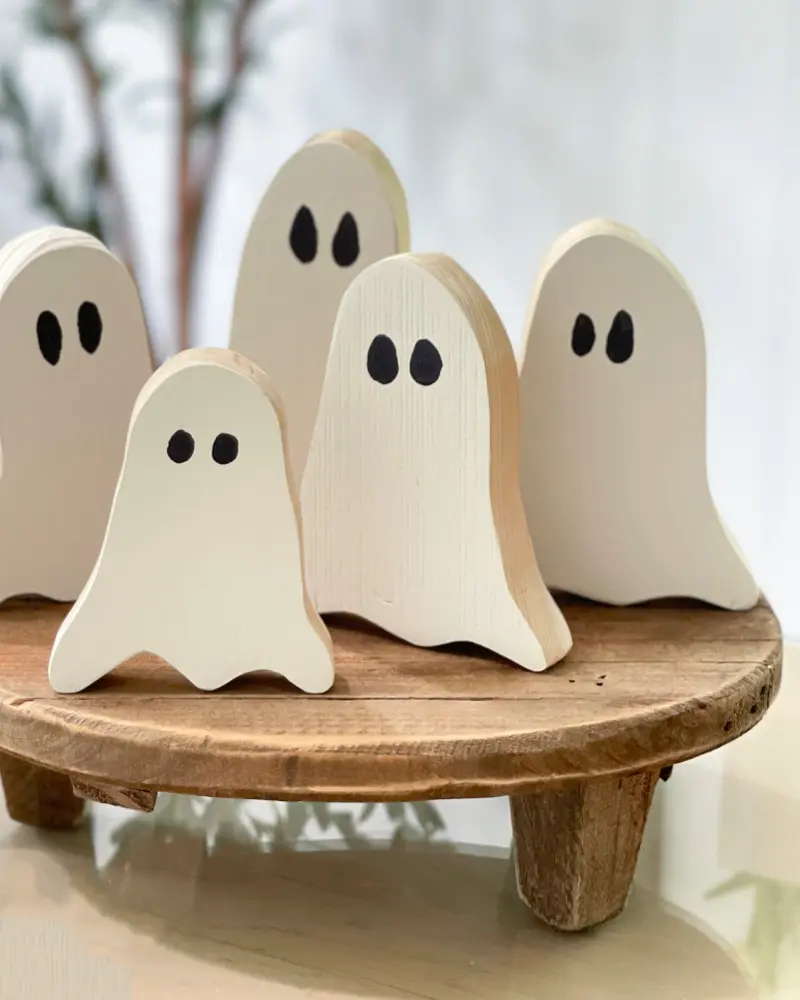
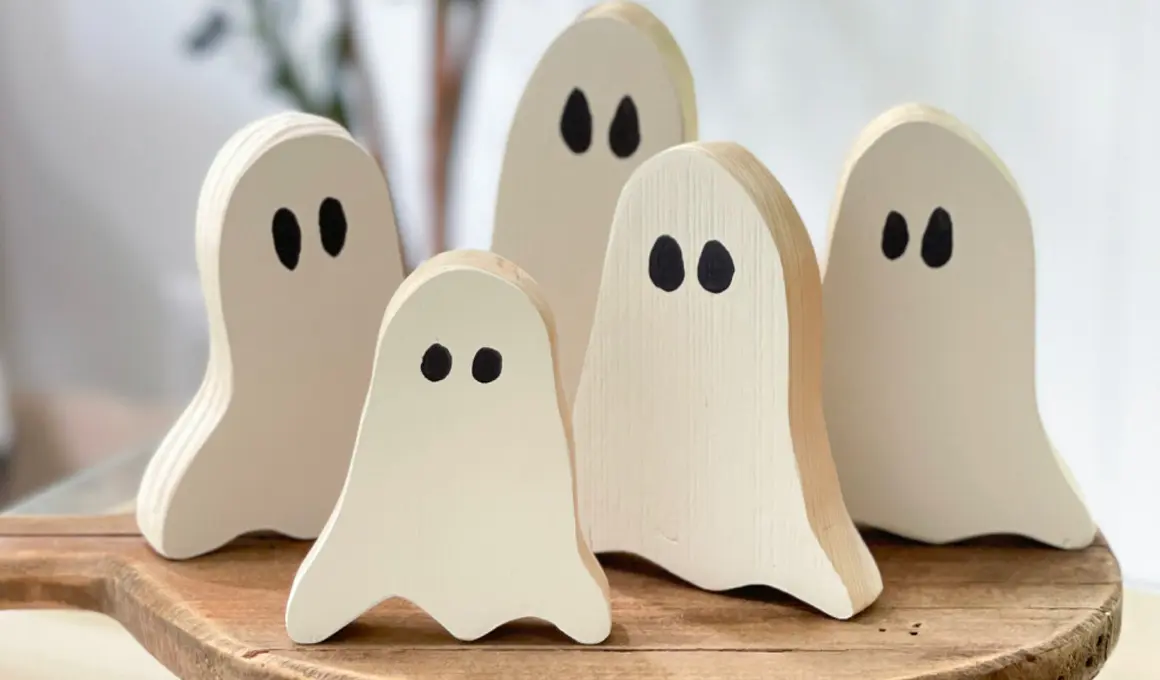
1. Four chunky white wooden ghosts lined up on a rustic wood riser © Do Dodson
These wooden ghosts are a cute, reusable decoration you can bring out every October. Cut-out wood shapes painted white with simple black faces look great lined up on a mantel or a shelf. If you’ll be using a saw, that part is a job for an adult.
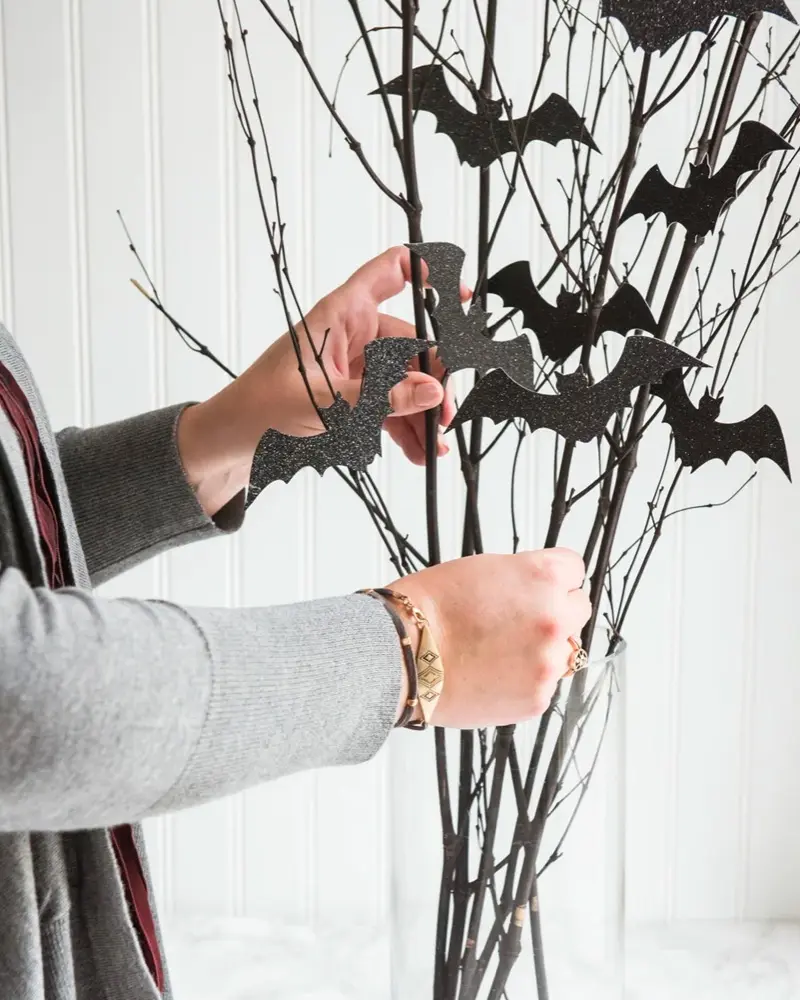
2. Black glitter bats clipped onto bare branches in a tall vase © The Sweetest Occasion
A bouquet of bats instead of flowers: what a fun idea for a Halloween centerpiece! Paper or cardstock bats on sticks are easy to cut out, and kids can help.
See the tutorial on The Sweetest Occasion
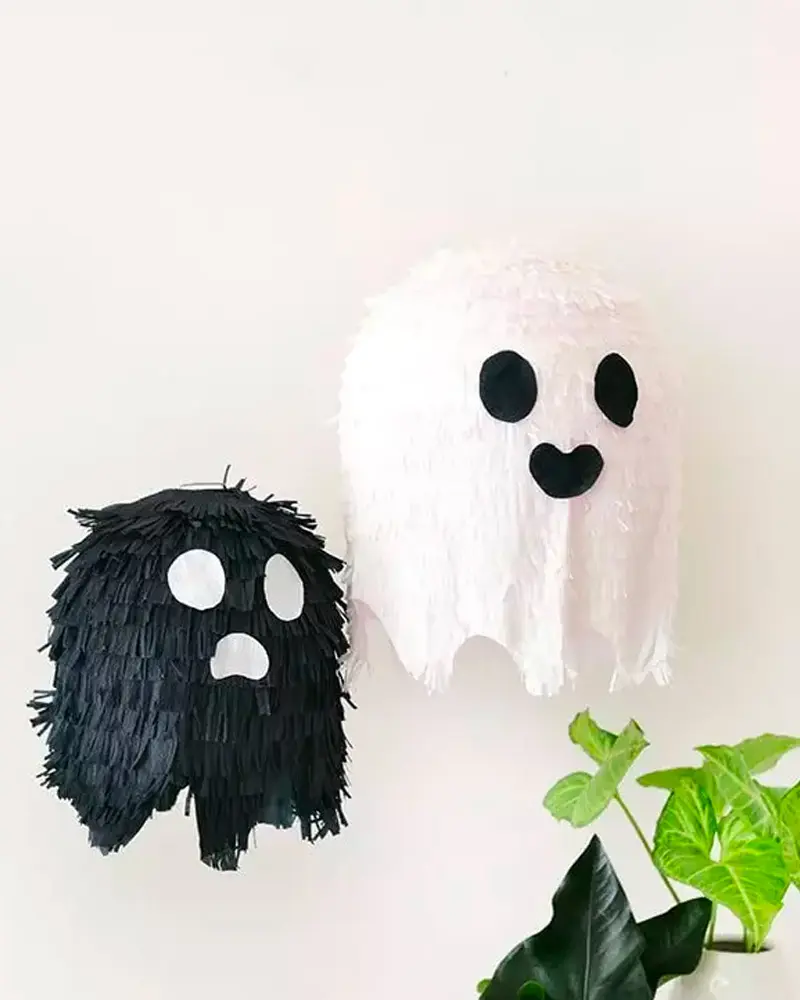
3. Fringed ghost piñatas, one black and one white, with felt faces © Make and Tell
Mini ghost piñatas are a festive decoration and an activity in one. Hang them up for the party, then let the kids break them open to find treats.
See the tutorial on Make and Tell
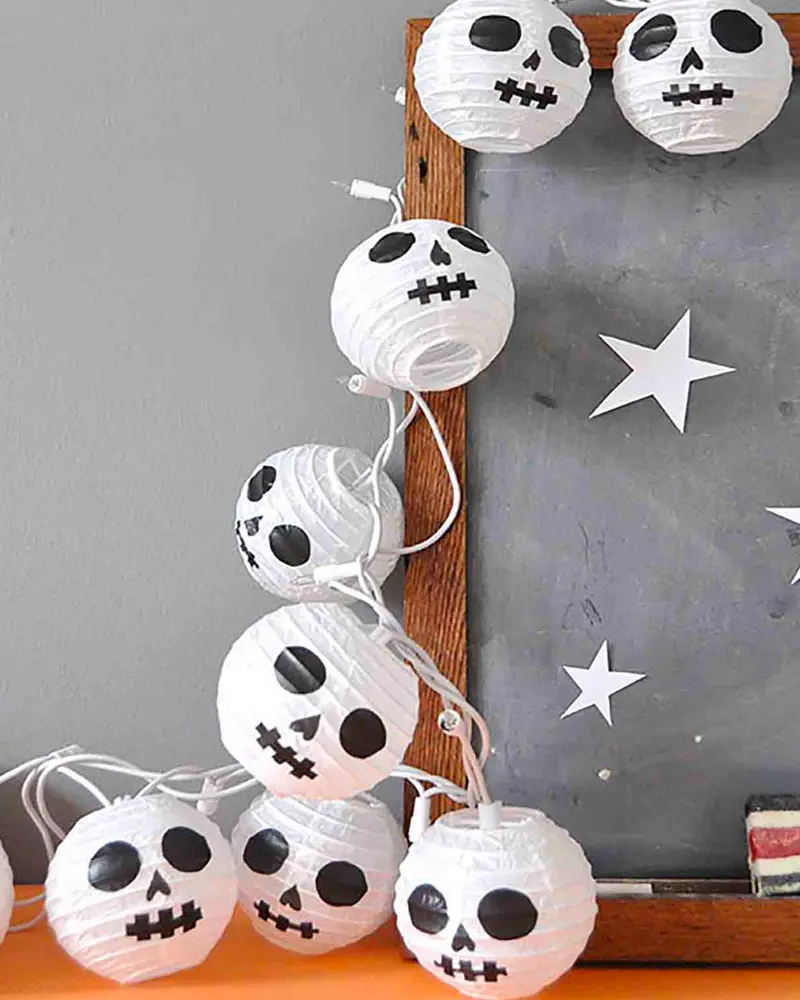
4. Round paper lanterns turned into grinning skulls, strung over a chalkboard © Minted
A string of paper lanterns adds a warm glow to any room. Use LED string lights or battery-operated lights inside paper lanterns, never real candles.
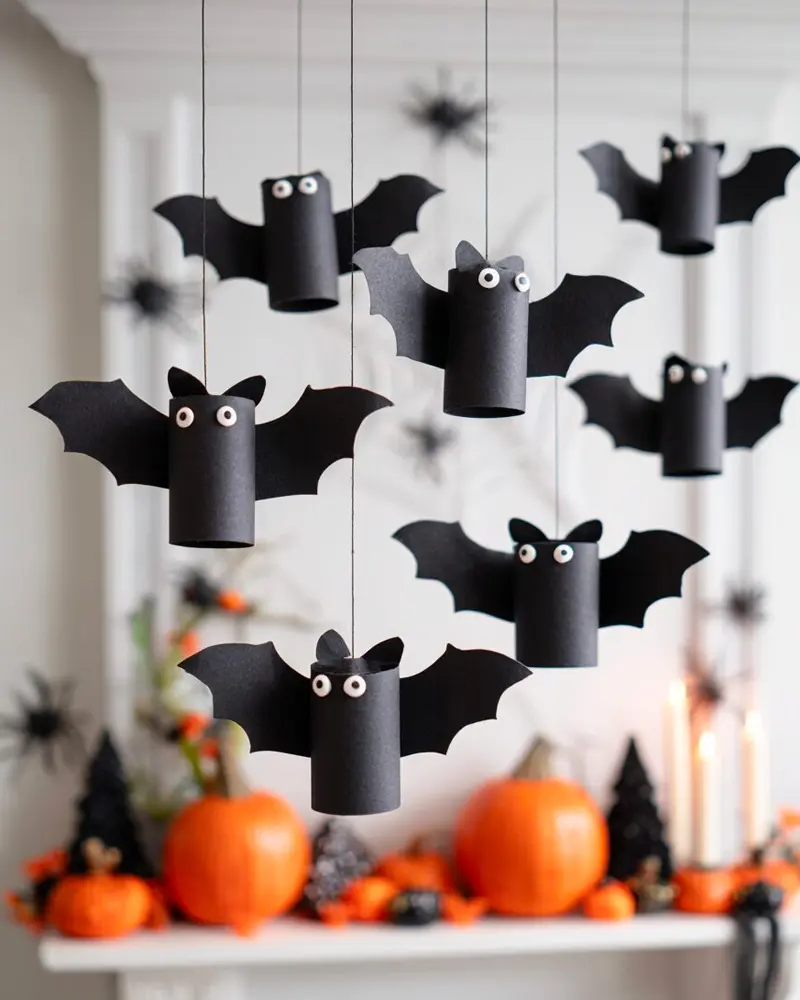
5. Black cardboard-tube bats with googly eyes dangle over a pumpkin mantel © Daily Magic
A classic kid-friendly upcycling craft: hanging bats made from toilet paper rolls. Paint the rolls black, add paper wings and googly eyes, and hang them from the ceiling or a branch.
See the tutorial on Daily Magic
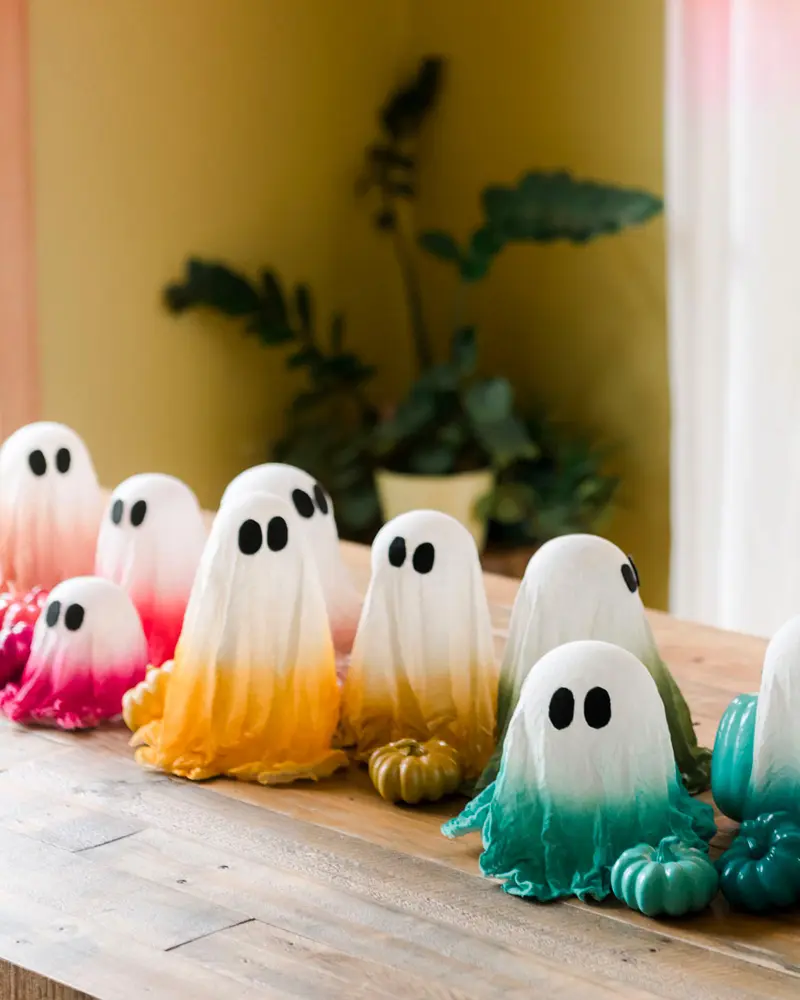
6. Cheesecloth ghosts dip-dyed in pink, marigold and teal march down a table © Oh Yay Studio
Who says ghosts have to be white? These colorful ghosts bring a playful, cheerful twist to classic cheesecloth ghosts.
If you’ve never made a cheesecloth ghost, the general method is easy to grasp: drape cheesecloth over a form (a balloon or a ball on top of a bottle works well), soak it with fabric stiffener or a mix of white glue and water, let it dry completely, then lift it off. The cloth keeps its ghostly shape, and the loose, gauzy edges look wonderfully eerie. Plan at least a day for drying, longer if your home is humid.
See the tutorial on Oh Yay Studio
When you group indoor decorations, think in small vignettes rather than spreading things everywhere. A mantel, an entry console or a bookshelf with three to five Halloween pieces looks more intentional than a few items scattered around the room. Mix heights (a tall bat bouquet, medium ghosts, a few small pumpkins) and repeat your colors so everything feels connected.
Front door ideas to greet trick-or-treaters
The front door is the first thing trick-or-treaters see, so it’s worth making an effort! Here are 6 DIY ideas for a spooky (or just plain fun) Halloween door and entryway.
For outdoor decorations, think about the weather: choose materials that can handle a little rain and wind, secure everything firmly, and keep steps and walkways clear so nobody trips in the dark.
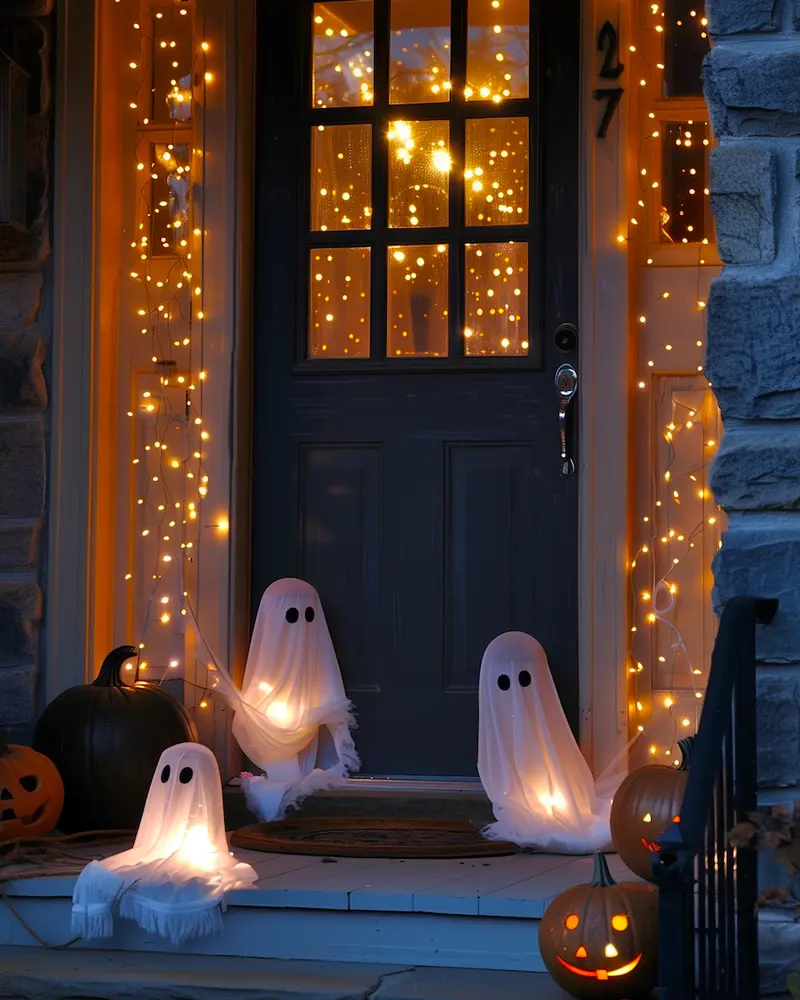
7. Lit-up ghosts glow on the steps of a porch draped in fairy lights © Living Letter Home
A few ghost figures on the porch create an instant Halloween welcome, and they look even better at night with a little light nearby.
See the tutorial on Living Letter Home
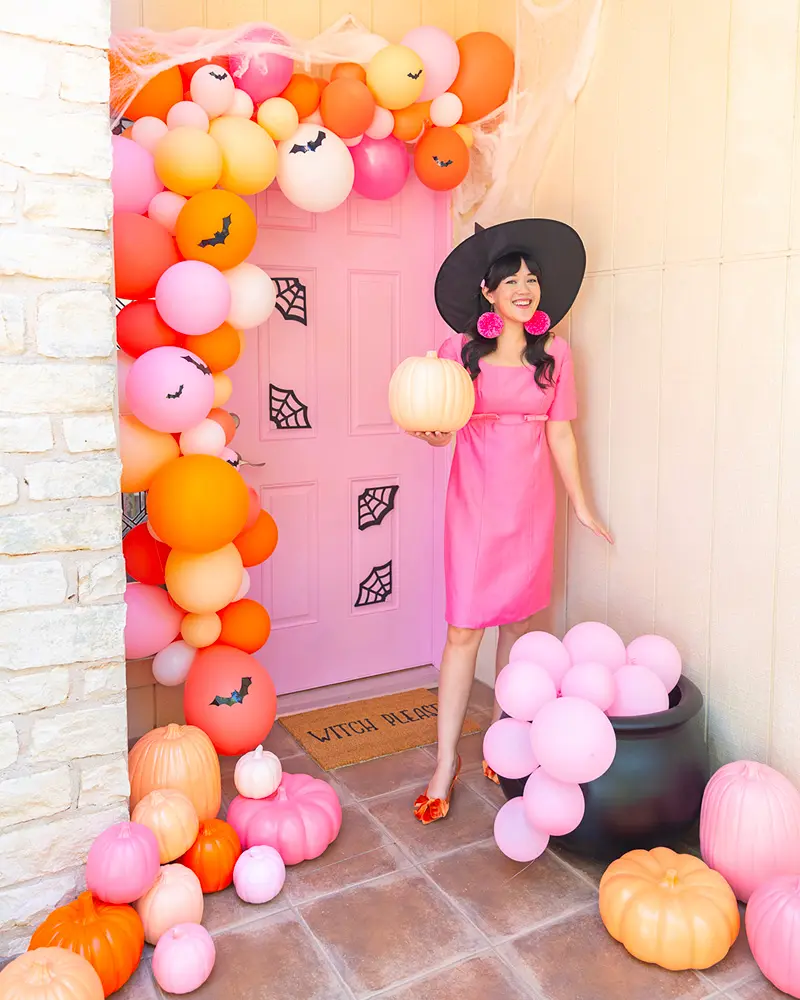
8. An orange and pink balloon arch framing a pink front door © Awwsam
Balloons are an easy, inexpensive way to make a big impact on a front door. Choose Halloween colors and arrange them around the door frame.
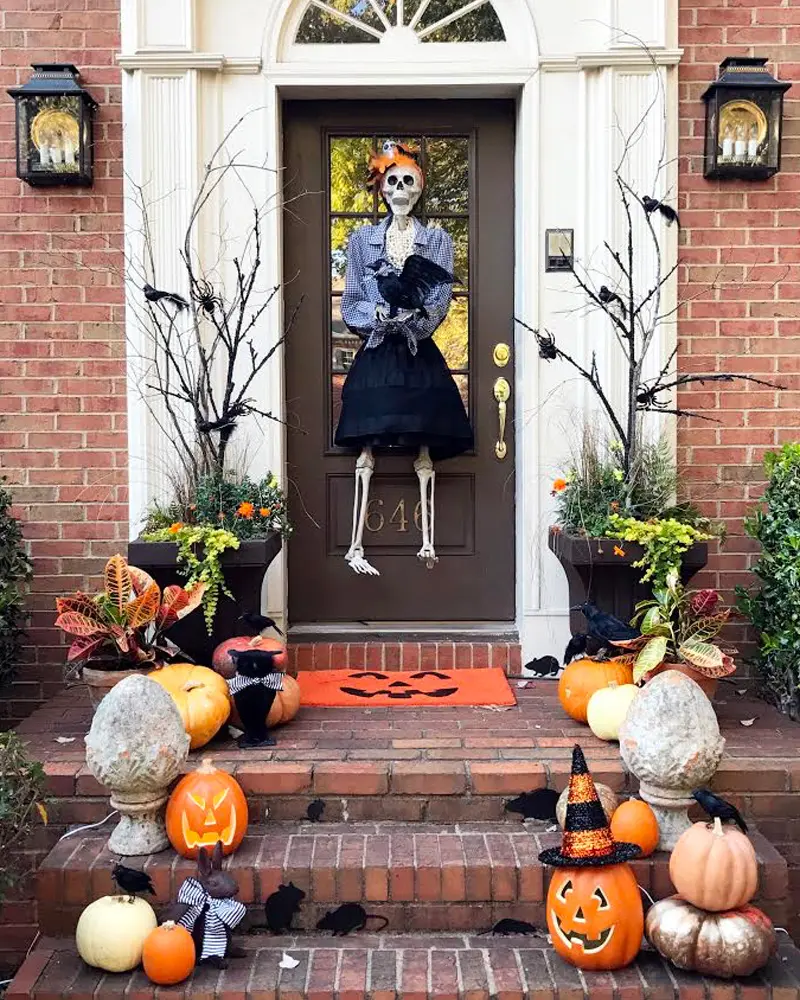
9. A dressed-up skeleton on the door and pumpkins lining the brick steps © The Pink Clutch
A skeleton on the door is a simple, spooky idea that always gets a reaction from passersby.
See the tutorial on The Pink Clutch
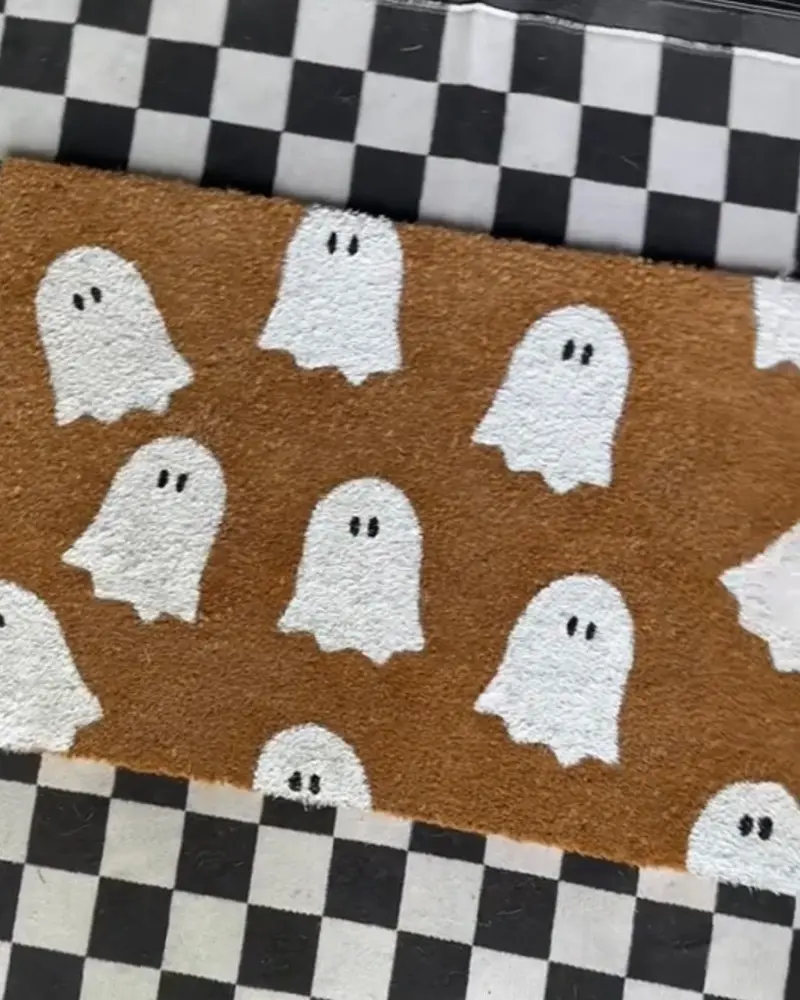
10. A coir doormat stamped with little white ghosts, layered on a checkered rug © Newbuild Newlyweds
A DIY doormat lets you greet guests with your own Halloween message. Stencils and outdoor paint are usually all you need to customize a plain coir mat.
See the tutorial on Newbuild Newlyweds
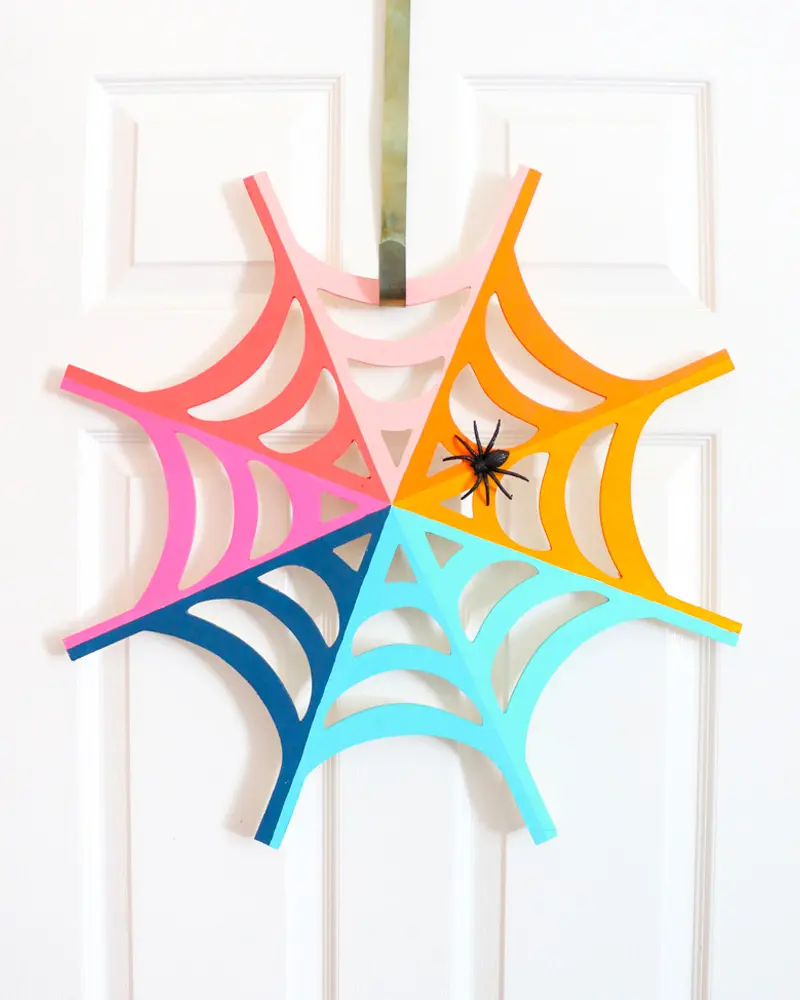
11. A paper spider web in rainbow segments, with one black spider at its center © A Kailo Chic Life
A colorful spider web wreath is a fresh, fun alternative to a classic fall wreath.
See the tutorial on A Kailo Chic Life
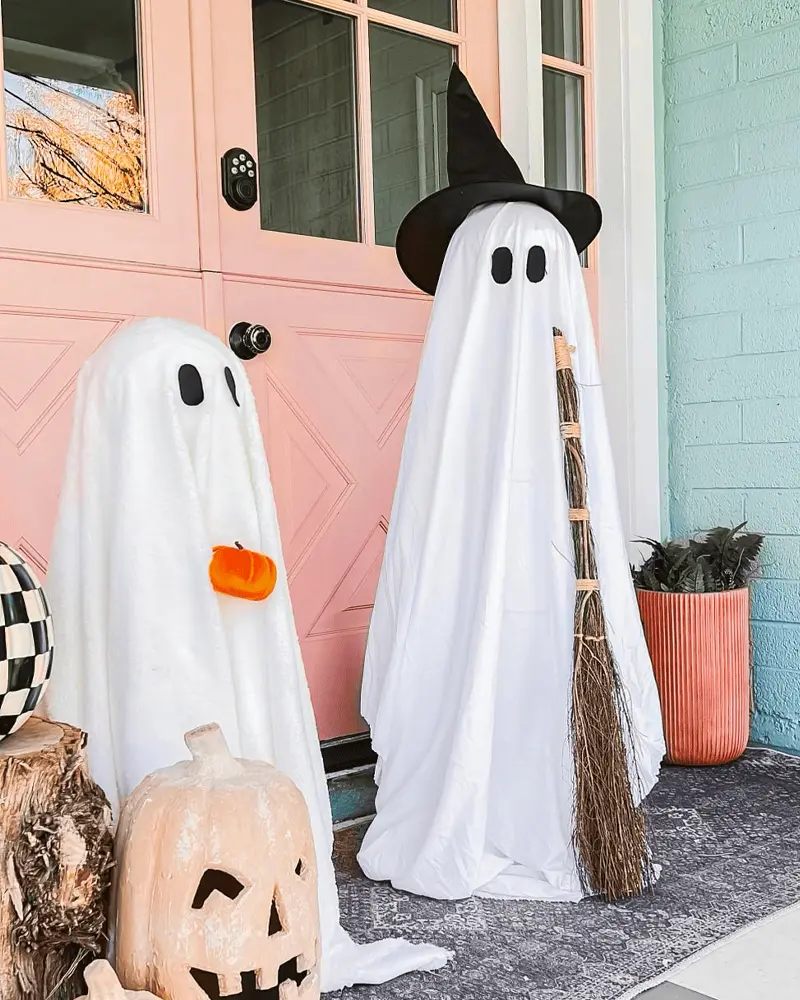
12. Two tall sheet ghosts, one in a witch hat with a broom, guard a pink door © Lolly Jane
A tomato cage makes a surprisingly good frame for a big ghost on the porch: a clever bit of garden upcycling.
See the tutorial on Lolly Jane
To pull your entryway together, combine one star piece (a wreath, a big ghost or a skeleton) with a few supporting details like pumpkins, lanterns with LED candles or a themed doormat. That way the door reads as one cohesive scene from the street. And if you have a covered porch, you can use more delicate materials like paper and fabric; on an exposed stoop, stick to sturdier options.
Why window silhouettes and drawings look so good at night
Finally, if you’d like to decorate your windows for Halloween, here are a few trendy, easy DIY ideas. With paper or a chalk marker, you’re sure to fall for at least one of these tutorials. Windows are great because your decorations can be seen from both inside and outside, especially at night with the lights on.
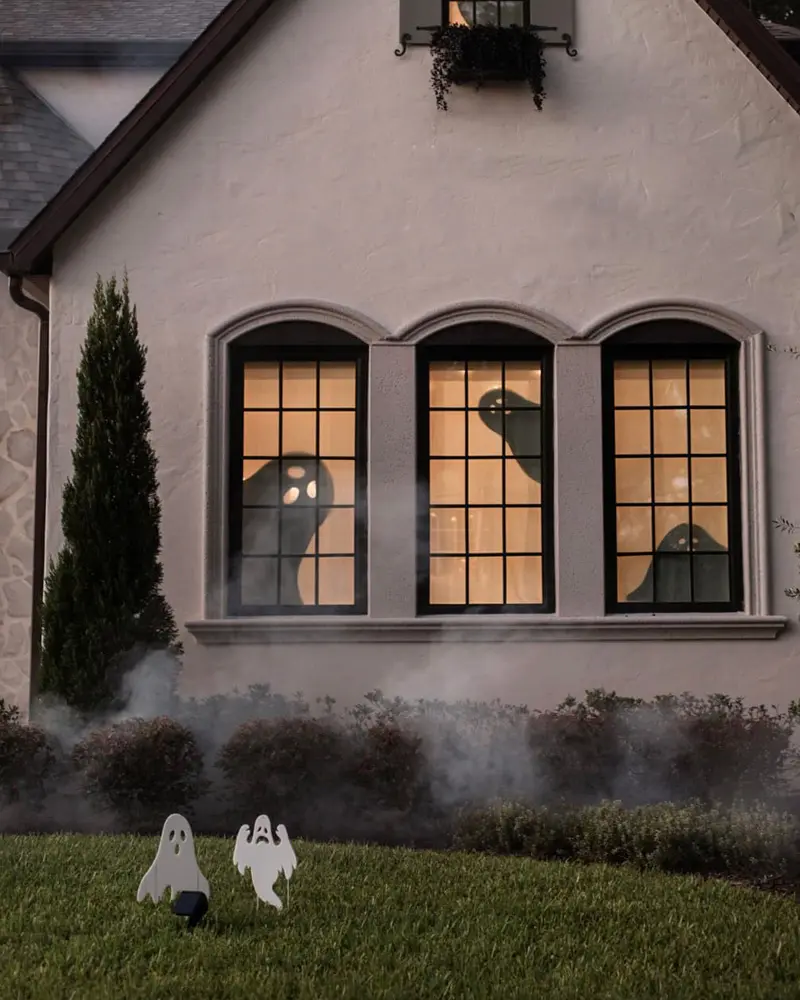
13. Ghostly black silhouettes peer out of three lit windows at dusk © Jennasue
Black silhouettes in the windows create a spooky shadow effect, especially at night when the room is lit from inside.
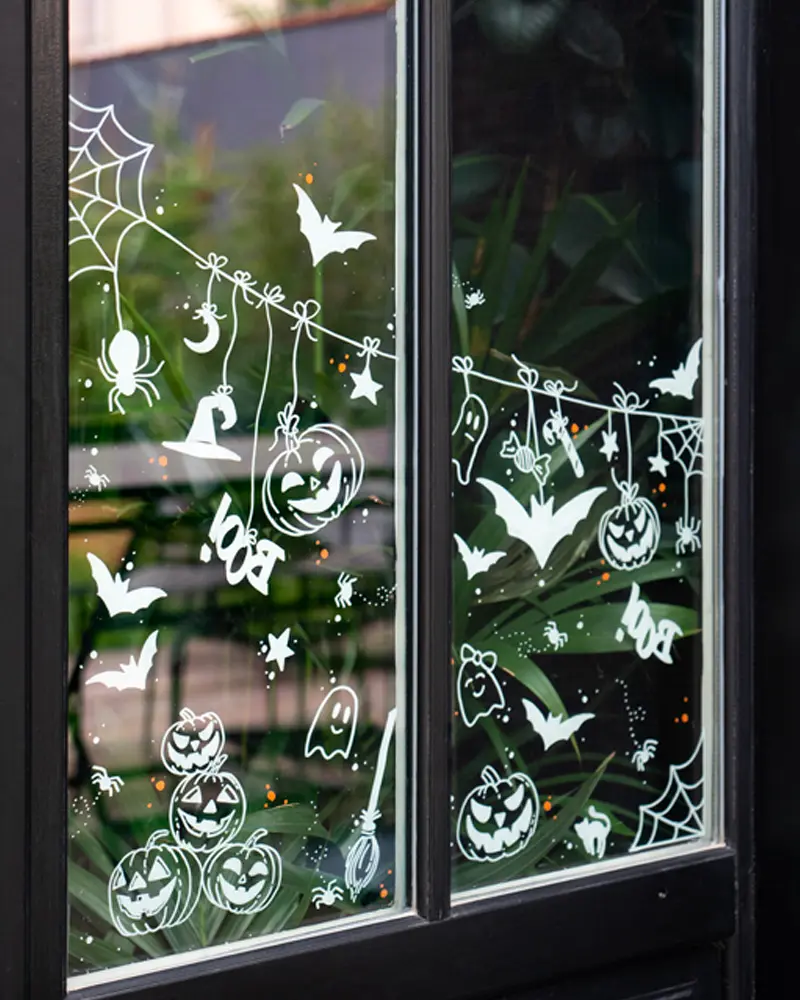
14. Jack-o’-lanterns, bats, spiders and a cheeky “Boo!” in white chalk marker © Jesus Sauvage
Chalk markers let you draw directly on the glass. Liquid chalk markers usually wipe off with a damp cloth, but test a small corner first.
See the tutorial on Jesus Sauvage
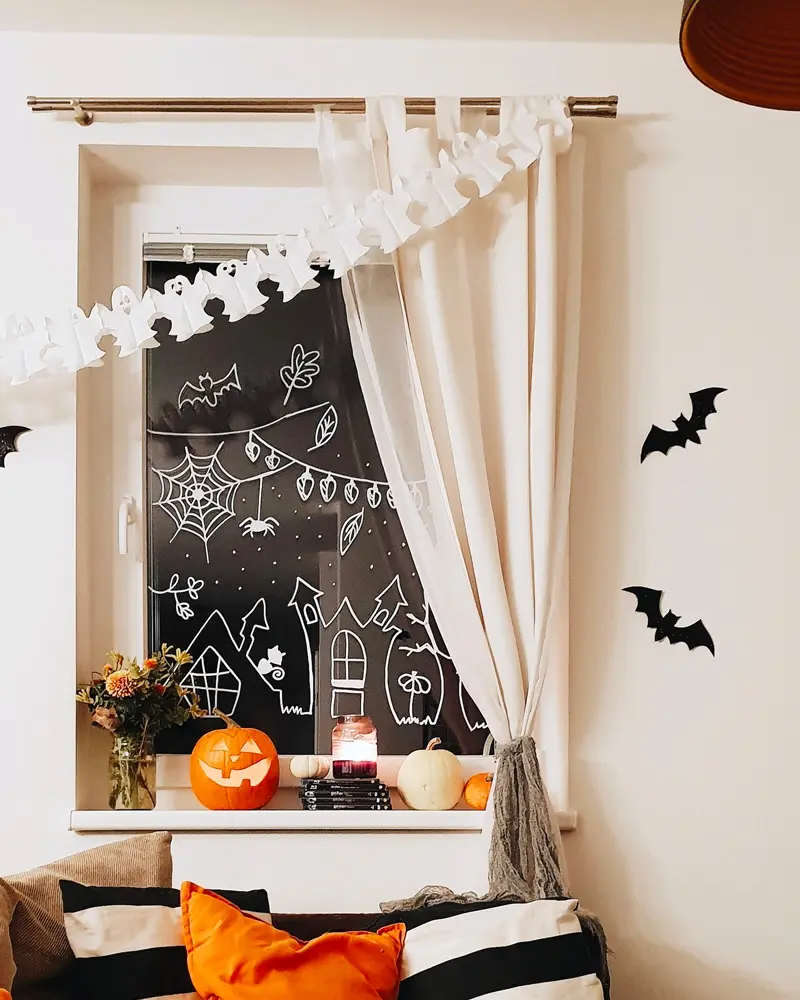
15. Chalk-drawn haunted houses and a paper ghost garland frame a cozy window © Starlights in the Kitchen
Another take on window drawing, proving there’s plenty of room for creativity on a pane of glass.
See the tutorial on Starlights in the Kitchen
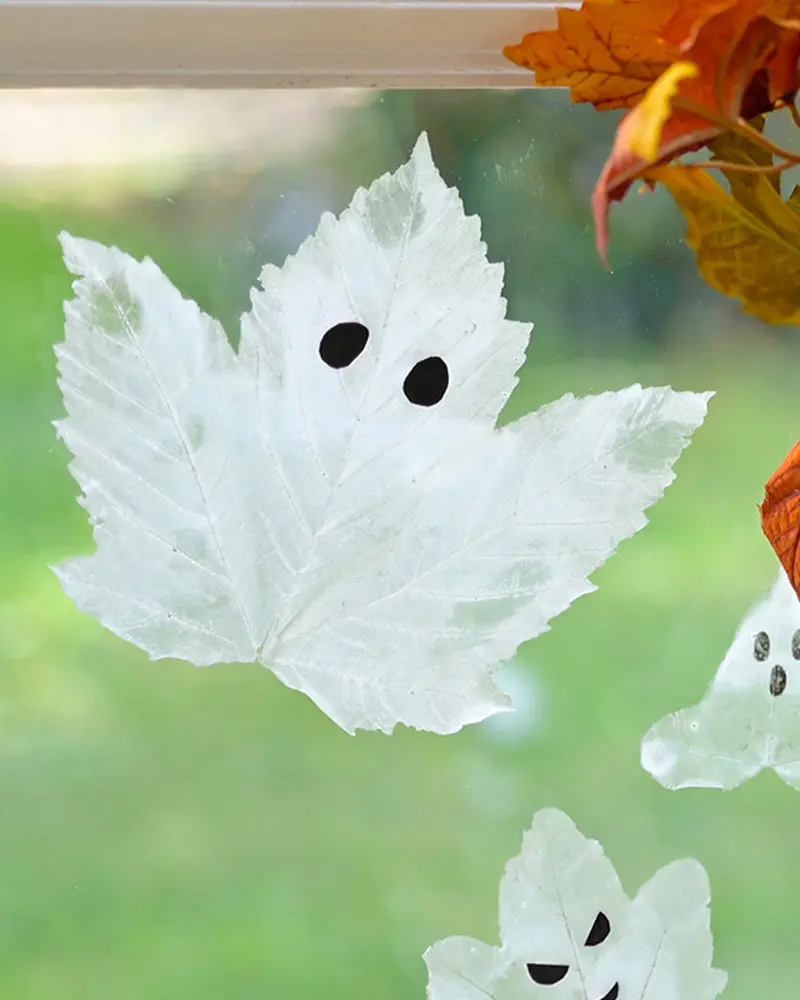
16. Maple leaves painted white with black eyes become ghosts on the glass © Mine 4 Sure
Ghosts and leaves combine Halloween and fall in one easy window decoration.
See the tutorial on Mine 4 Sure
A few tips for window decorations: clean the glass before you start so tape and chalk markers stick properly, and use removable painter’s tape or a little dish soap and water to hold paper cutouts in place without leaving residue. For silhouettes, black cardstock gives the crispest shadow. If you’re drawing with a chalk marker, sketch your design lightly first, or tape a printed template to the outside of the glass and trace it from the inside.
Window clings are another kid-friendly option: they stick by static, peel off easily and can be reused next year. Paper cut-outs taped to the inside of the glass are just as easy, and when the room behind them is lit, they create a striking silhouette for anyone passing by on the sidewalk.
Spooky or cute? How to choose your Halloween style
Before you dive in, decide what kind of Halloween you want. With little kids, go for friendly ghosts, smiling bats and colorful touches like the rainbow web; to give the neighbors a fright, lean into skeletons and black silhouettes. A middle ground I love is a chic black, white and natural-wood Halloween that transitions easily into fall (my wood decor ideas can help).
Practical tips for your DIY Halloween decor
A few practical tips make your DIY Halloween decor easier, safer and longer-lasting. From craft supplies and safe lighting to kid-friendly projects, a simple timeline and storage, here’s how to plan it all.
Craft supplies worth stocking up on
- Black, white and orange cardstock and construction paper
- Craft scissors, a glue stick and a hot glue gun (adults only for hot glue)
- Acrylic paint and brushes
- Cheesecloth, twine and fishing line for hanging
- Chalk markers for windows
- Battery-operated LED candles and string lights
- Recycled materials: toilet paper rolls, glass jars, cardboard
Lighting and decorating safely
Use LED candles and battery-operated lights instead of open flames, especially near paper, fabric or cheesecloth decorations, which catch fire easily. Keep porch steps and walkways clear of decorations and cords, and make sure the entrance is well lit so trick-or-treaters can see where they’re stepping. Securely anchor anything that could blow over in the wind.
Easy projects to hand over to kids
Many of these projects are perfect for kids: paper bats, toilet paper roll crafts, window drawings and painting. Prep the materials in advance, cover the table, and let the adults handle hot glue, saws and craft knives. Younger children often prefer cute rather than scary, so go with friendly ghosts and smiling bats!
A two-weekend plan to finish on time
Give yourself a couple of weekends in early October. The first weekend, make anything that needs drying time (painted wood, cheesecloth ghosts, doormats); the second, handle the door and window projects, saving real pumpkins for the last few days. Buy all supplies in one trip, raid your recycling for jars and toilet paper rolls, and test outdoor lighting before the big night.
Pack it away for next October
Wooden, fabric and paper decorations can be kept from year to year: wrap them in tissue paper and store them in a labeled bin in a dry place. Want more ideas? Check out my DIY pumpkin ideas, my Halloween table decorations and these Halloween printables.
Frequently asked questions
How can I decorate for Halloween on a budget?
Use paper, cardboard, recycled toilet paper rolls and glass jars, and decorate with paint you already have. Paper bats, window silhouettes and cheesecloth ghosts cost very little and still make a big impact.
What are easy Halloween decorations to make with kids?
Toilet paper roll bats, paper window silhouettes, painted pumpkins and paper garlands are all easy and safe for kids. Let the adults handle hot glue and cutting tools.
How do you decorate a front door for Halloween?
Try a themed wreath, a painted doormat, a skeleton, balloons or ghost figures. Choose weather-resistant materials, secure everything firmly and keep the walkway clear and well lit.
How do you decorate windows for Halloween?
Black paper silhouettes, chalk marker drawings and paper ghosts are the easiest options. Window silhouettes look especially striking at night, when the room is lit from the inside.
When should I put up Halloween decorations?
Many people decorate from the beginning of October, while others wait until mid-October. Non-perishable decorations can go up early, but save carved pumpkins for the last few days before Halloween.