A DIY headboard can completely change the feel of a bedroom. It creates a real focal point that reflects your personality, and making your own means you can size it and style it exactly for your bed, whether you want a soft upholstered panel to lean against, a warm wood statement or a simple painted shape that costs next to nothing. The result has a one-of-a-kind look you just won’t find in stores, and many of these projects come together in a single afternoon or weekend.
I’ve rounded up 23 DIY headboard ideas that explore different techniques and materials: paper and wallpaper, fabric and foam, wood, and paint. They work as well in boho bedrooms as in minimalist or industrial ones, and they range from super simple to more involved. Each one adds character without blowing your decor budget. Browse our bedroom decor ideas and our other DIY projects for more, and see my Scandinavian bedroom ideas for ways to style the room around it.
Contents
1. Measure first: headboard width, height and mounting
2. How to make paper headboards that are light, creative and renter-friendly
3. Why upholstered fabric headboards bring comfort and style
4. Wood headboard ideas with natural, timeless appeal
5. Painted headboards full of color and personality: how to try them
Measure first: headboard width, height and mounting
Measure your bed first: a headboard looks best at the width of the frame or a few inches wider (a queen is about 60 inches (152 cm) wide), and most sit 35–50 inches (90–130 cm) from the floor, higher if you read in bed. Decide whether it will bolt to the frame, hang on the wall or be painted on, and hang anything heavy into studs, ideally with a French cleat.
How to make paper headboards that are light, creative and renter-friendly
Paper is a budget-friendly way to play with pattern and color, and it’s easy to change later. Choose peel-and-stick wallpaper or mount the paper on a board, and renters can take it with them when they move.
1. A botanical arch paper headboard
Level: Easy | Time: 2–3 hours | Budget: $15–30 | Materials: Wallpaper or colored paper, utility knife, glue, ruler

1. Overlapping arches, one in leafy print paper, one painted sage, behind linen pillows © 18h39
This paper headboard transforms a bedroom with nature-inspired arch shapes. You cut and glue botanical motifs to create a modern, graphic relief. It suits boho or contemporary decor, and the simple cuts and basic supplies make it doable for beginners.
Use a sharp craft knife with fresh blades and a self-healing cutting mat for crisp curves, and sketch your arches on the back of the paper first. Tracing a large plate or bowl, or using a string and pencil as a compass, makes it much easier to get smooth, even shapes.
2. A mural wallpaper headboard
Level: Easy | Time: 2–3 hours | Budget: $35–55 | Materials: Mural wallpaper, wallpaper paste, utility knife, level

2. Soft sage hills and a pale sun stretch across the wall above a brass bed © Wellpapers
This project creates a modern headboard by applying mural wallpaper straight onto the wall. You mark out a rectangle behind the bed and hang the wallpaper like a giant piece of art. It instantly adds character to a pared-back bedroom, and I love that it needs no drilling or hardware.
A mural is a great way to bring in a large-scale landscape, botanical or abstract design without committing to an entire accent wall. Use a level and a pencil to mark the edges of your rectangle, and paint the border or add a thin wood trim around it for a crisp, finished look.
See the tutorial on Wellpapers
3. A geometric paper patchwork headboard
Level: Easy | Time: 2–3 hours | Budget: $15–30 | Materials: Colored paper, utility knife, ruler, glue, pencil

3. A band of pastel paper triangles hangs above crisp white bedding © Design Tuts+
This geometric headboard transforms a wall with colored paper shapes. You cut geometric pieces and arrange them in a harmonious patchwork. The result is modern and graphic, perfect for a contemporary bedroom, and still easy for DIY beginners.
Lay out the whole patchwork on the floor before you glue anything down, and take a photo so you can reproduce the arrangement on the wall. Removable mounting putty is handy for testing the composition in place first.
See the tutorial on Design Tuts+
4. A faux brass wallpaper headboard
Level: Easy | Time: 3–4 hours | Budget: $35–55 | Materials: Gold metallic wallpaper, plywood, adhesive, cutting tools

4. A gleaming gold panel behind a bed with a banana-leaf throw © Sugar and Cloth
This project turns a plain board into an elegant headboard with a brass-like finish. You wrap the panel in metallic wallpaper for a high-end look. It brings a sophisticated touch to a bedroom and works with both modern and classic decor, all while staying beginner-friendly.
See the tutorial on Sugar and Cloth
5. A plywood art print headboard
Level: Intermediate | Time: 3–4 hours | Budget: $45–65 | Materials: Plywood, large-format print, PVA glue, saw, sander

5. A misty black-and-white mountain print framed in plywood © The Merrythought
This project turns a simple poster into a statement headboard with a plywood backing. You glue the print onto sanded wood for a modern, graphic effect. It adds a real artistic touch to the bedroom. Cutting the wood takes some precision, but the result is well worth it.
Large-format prints can be ordered from many online print shops, so you can use your own photo, a vintage map or a botanical illustration. Seal the finished piece with a clear matte varnish to protect the paper from fingerprints and fading.
See the tutorial on The Merrythought
Why upholstered fabric headboards bring comfort and style
Fabric makes a headboard you’ll want to lean against. Use 2–4 inches (5–10 cm) of medium-to-firm foam topped with batting, choose an upholstery-weight fabric like velvet, linen blend or boucle, and staple from the center of each side out toward the corners, pulling evenly.
6. A colorful geometric foam headboard
Level: Intermediate | Time: 4–5 hours | Budget: $65–90 | Materials: High-density foam, colored fabric, spray adhesive, utility knife, ruler
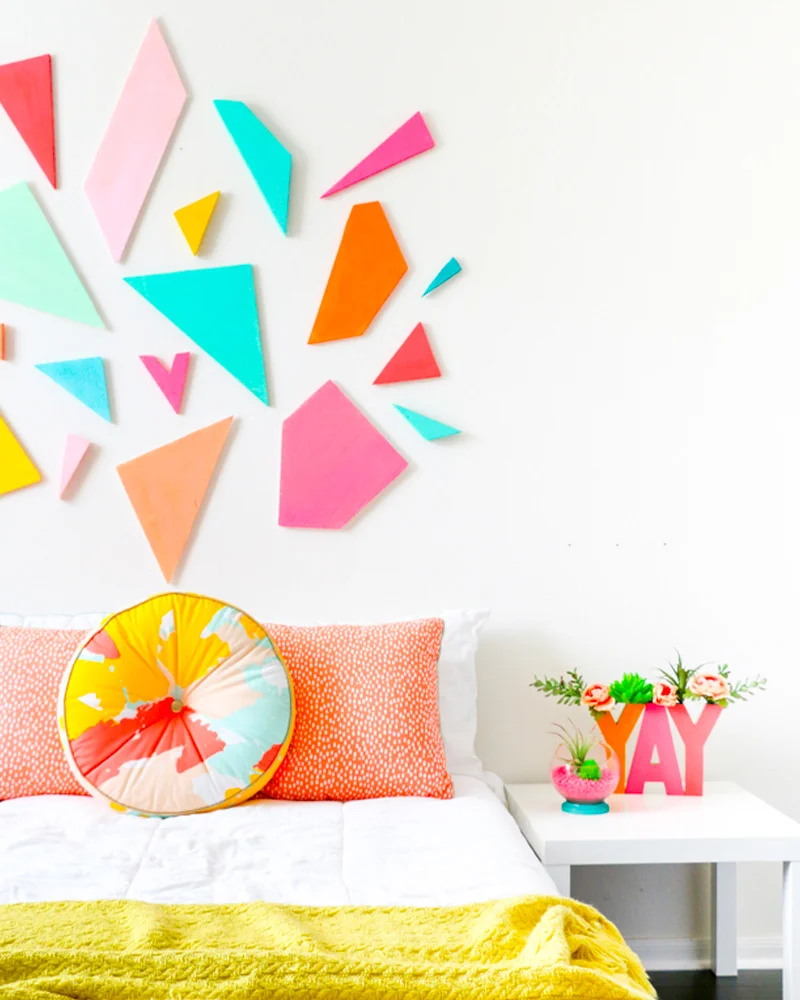
6. Neon-bright geometric shapes in coral, pink and turquoise above the bed © A Kailo Chic Life
This headboard livens up a bedroom with vibrant geometric shapes. You cut triangles from foam and cover them in contrasting fabrics. The result is modern and artistic and suits contemporary spaces. The precise cutting and assembly take some patience, but it really personalizes the room.
See the tutorial on A Kailo Chic Life
7. An upholstered headboard with a removable cover
Level: Intermediate | Time: 4–5 hours | Budget: $35–55 | Materials: Plywood, foam, fabric, zipper, staple gun

7. A soft white padded headboard over a textured cream bedspread © Pierre Papier Ciseaux
This project makes a padded headboard with a removable fabric cover. It combines cutting wood, adding foam and sewing a zippered cover. Because the cover comes off, it’s easy to clean and you can switch up the style whenever you like. It requires some sewing skills, but the comfort is worth it.
A removable cover is a real advantage in a bedroom, where headboards collect dust and the occasional hair product. Check the fabric’s care label and prewash it before sewing so it doesn’t shrink after the first wash.
See the tutorial on Pierre Papier Ciseaux
8. An elegant velvet upholstered headboard
Level: Intermediate | Time: 4–5 hours | Budget: $65–90 | Materials: Velvet fabric, polyurethane foam, plywood, staple gun, mounting screws

8. Sage velvet in rounded channels, piled with coral and tropical pillows © Maison Créative
This velvet upholstered headboard instantly adds a luxurious feel to the bedroom. Cutting the wood, adding foam and wrapping it in fabric gives a professional-looking result. Velvet’s rich texture suits modern or classic decor, and it’s a great way to customize your space on a controlled budget.
See the tutorial on Maison Créative
9. A chunky woven yarn headboard
Level: Intermediate | Time: 4–6 hours | Budget: $45–65 | Materials: Wood board or dowel, chunky yarn or fabric tubes, staple gun, scissors

9. Chunky roving woven in waves of yellow, peach and white © Etsy Blog
This project creates an original headboard with a chunky woven pattern. You interlace thick yarn or stuffed fabric tubes in yellow, peach and white for a soft, graphic effect. The result has a cozy, tactile texture that suits contemporary and boho bedrooms, and it’s an eye-catching way to make your decor unique.
Weaving works best with very thick yarn or fabric strips sewn into tubes, which don’t fray. Keep the tension even as you weave, and secure each strand firmly at the back or around the top bar before trimming the excess.
10. A slipcovered headboard with a zip cover
Level: Intermediate | Time: 4–5 hours | Budget: $35–55 | Materials: Plywood, foam, fabric, zipper, staple gun

10. A wide tan panel with a pocket shelf behind blush bedding © Marguerite et Jorge
Here’s another take on a custom headboard with a removable cover. You cut the wood, glue on foam and sew a zippered slipcover. It adds a cozy, modern touch to the bedroom and stays practical to clean. You’ll need some sewing skills, but it’s doable with patience.
See the tutorial on Marguerite et Jorge
11. A patchwork fabric headboard
Level: Intermediate | Time: 4–6 hours | Budget: $35–55 | Materials: Assorted fabric scraps, batting, sewing machine, wood board, staple gun

11. Raspberry and pink quilt-block patchwork under a sloping attic ceiling © Marie Claire
This project creates a unique headboard by piecing together different fabrics in a patchwork. You need some basic sewing skills to join the pieces neatly. I especially love that it uses up fabric scraps while fully personalizing your bedroom. The result is colorful and boho, perfect for eclectic spaces with character. If that’s your style, my boho decor guide has more ideas.
Patchwork is a wonderful way to use fabric scraps, old clothes or vintage linens with sentimental value. Press each seam flat with an iron as you go, and choose fabrics of similar weight so the finished panel stretches evenly over the foam.
See the tutorial on Marie Claire
12. An IKEA cushion headboard hack
Level: Easy | Time: 3–4 hours | Budget: $55–90 | Materials: IKEA cushions, wood board, fabric, staple gun

12. A black cushion hung from leather straps, with a pink pillow in front © Geneva Vanderzeil
This project turns simple IKEA cushions into an elegant padded headboard. You attach the cushions to a wood board and cover them with the fabric of your choice. It adds a cozy, modern touch that’s perfect for a Scandinavian or contemporary bedroom, and you get a polished result with no upholstery skills.
Attaching cushions to a board or a rod is one of the quickest ways to get an upholstered look without cutting foam. It’s also easy to update: change the covers and the whole bedroom gets a new look in minutes.
See the tutorial on Geneva Vanderzeil
13. An extra-wide velvet headboard
Level: Intermediate | Time: 4–5 hours | Budget: $90–130 | Materials: Plywood, velvet fabric, foam, staples, mounting screws

13. Forest-green tufted channels span the whole wall under the skylights © Fabric Paper Glue
This project creates a statement headboard that completely changes the feel of the bedroom. You cover a wood panel with velvet for a luxurious, comfortable look. The extra-wide format adds drama, perfect for modern or classic spaces. Cutting and assembling take precision, but the result is worth it.
See the tutorial on Fabric Paper Glue
Wood headboard ideas with natural, timeless appeal
Wood suits every style, from rustic to contemporary, and instantly warms up a bedroom. Sand every edge that might touch skin or bedding, then finish with a water-based polyurethane, oil or wax. See my wood decor ideas for more inspiration.
14. A salvaged door headboard
Level: Intermediate | Time: 1 weekend | Budget: $55–90 | Materials: Old doors, sander, paint, wall mounting hardware

14. A chippy, weathered door under a crystal chandelier © Dreamy Whites
This project turns old wooden doors into a beautiful vintage headboard. You sand, paint and mount the doors to the wall for an authentic look. It brings rustic charm to a farmhouse or industrial bedroom, and it’s a great way to give salvaged pieces a second life.
Old doors can be very heavy, so check them carefully for loose hinges, nails or peeling paint before you bring them into the bedroom. If the door may have been painted before 1978, test the paint for lead before sanding, and if it does contain lead, don’t sand it yourself: seal it in or have it handled by a professional.
See the tutorial on Dreamy Whites
15. A herringbone wood headboard
Level: Intermediate | Time: 1 weekend | Budget: $90–130 | Materials: Wood boards, saw, drill/driver, wood glue, sandpaper, stain or paint

15. Herringbone in mixed wood tones, from natural to washed blue © I Spy DIY
This project makes an elegant headboard with a herringbone pattern that adds character to the bedroom. You cut boards at precise angles and assemble them into the pattern. It suits modern or industrial spaces. The main challenge is accurate cuts and alignment, but once you get the hang of it, the result looks very professional.
A miter saw makes it much easier to cut the precise angles a herringbone pattern needs. Dry-fit the pattern before gluing and nailing, and start from a central guide line so the chevrons stay symmetrical across the whole headboard.
16. A modern geometric wood headboard
Level: Intermediate | Time: 4–6 hours | Budget: $90–130 | Materials: Wood strips, saw, drill/driver, sandpaper, stain or paint

16. Light wood strips cut into a long hexagon pattern under a bull photo © I Spy DIY
This geometric headboard brings clean, modern lines to the bedroom. You assemble wood strips in an original geometric pattern that adds dimension to the wall. It’s a great fit for contemporary and Scandinavian interiors. The cuts need precision, but it’s doable with a little patience.
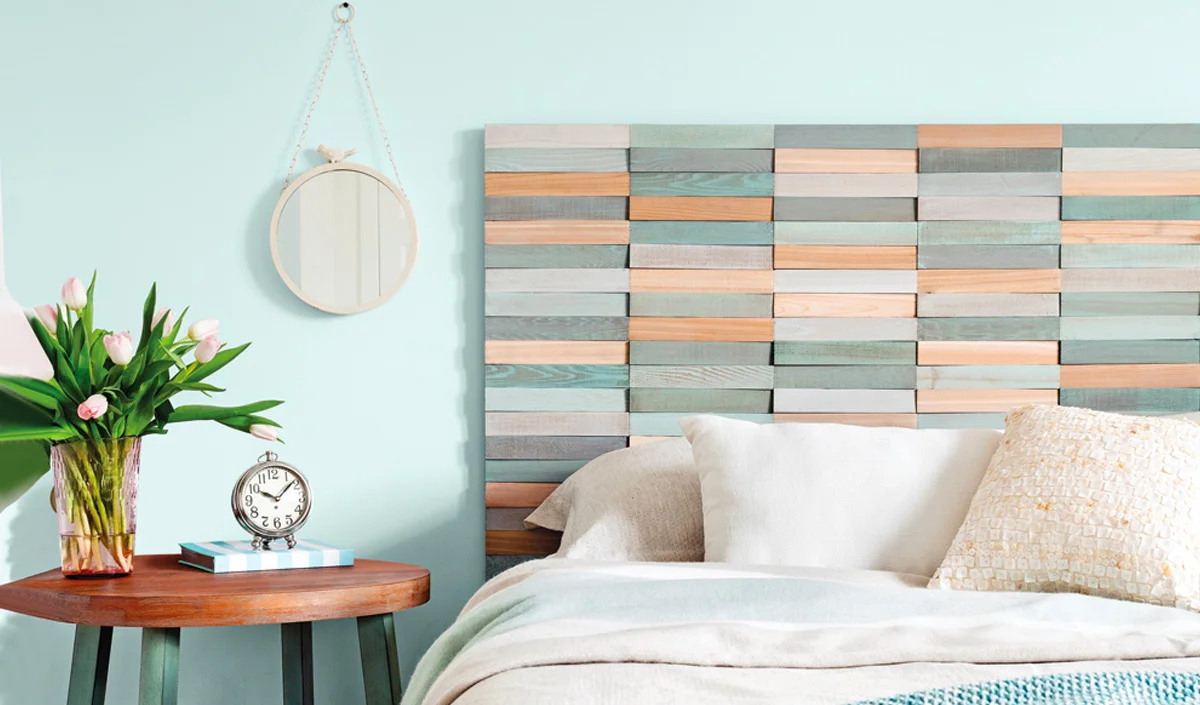
17. A color-block wood relief headboard
Level: Intermediate | Time: 1 weekend | Budget: $45–65 | Materials: Wood boards, acrylic paint, brushes, screws, drill

17. Staggered wood blocks in sage, blush and gray on a pale blue wall © Je Décore
This project creates an original headboard with colorful geometric shapes in relief. Cut wooden shapes and a playful palette combine for a modern, personal look that’s perfect for adding character to a contemporary bedroom. It’s rated intermediate because of the precise cuts and assembly.
18. A live edge wood headboard
Level: Intermediate | Time: 1 weekend | Budget: $90–165 | Materials: Live edge slab, wall brackets, screws, sander, oil or varnish

18. A wavy-topped wood slab with a little black sconce mounted on it © Classy Clutter
This project turns a single raw wood slab into a design-forward headboard. The live edge keeps the natural contour of the wood for an authentic yet modern look. It fits Scandinavian or industrial decor beautifully. Wall mounting takes some DIY skills, but it’s manageable with the right tools.
Live edge slabs are often sold by lumberyards and specialty wood shops. Make sure the slab is properly kiln-dried so it doesn’t twist or crack once it’s indoors, and decide whether you want to keep the bark or remove it, since loose bark can flake off over time.
See the tutorial on Classy Clutter
19. A wood plank wall headboard with built-in storage
Level: Intermediate | Time: 1 weekend | Budget: $90–130 | Materials: Wood boards, furring strips, screws, brackets, paint or stain

19. Whitewashed pine planks with a built-in niche above the pillows © Lili in Wonderland
This wood headboard completely changes the mood of a bedroom. It combines vertical wall planks with handy storage niches. The result is modern and warm, perfect for a Scandinavian or industrial style. It takes some DIY skills, but it’s doable with patience.
A headboard with built-in shelves or niches is a smart solution in a small bedroom where there isn’t room for full-size nightstands. Plan the shelf depth to hold what you really use at night, like a book, a phone and a small lamp, and include an outlet or a cord channel if you can.
See the tutorial on Lili in Wonderland
Painted headboards full of color and personality: how to try them
Paint is the cheapest, most renter-friendly option on this list: it creates a striking shape for almost nothing and can be changed whenever you like. A matte or eggshell finish hides wall imperfections, and well-pressed painter’s tape gives crisp lines.
20. A painted headboard to transform your bedroom
Level: Easy | Time: 1 weekend | Budget: $35–55 | Materials: Wall paint, brushes, roller, painter’s tape, level

20. A forest-green painted rectangle frames a bed in denim blue © A Beautiful Mess
This project creates a headboard right on the wall with paint. You can draw geometric or organic shapes to suit your taste. The technique works beautifully in modern and Scandinavian bedrooms, and the result is elegant and personal without any special DIY skills.
Sketch your shape lightly in pencil, then step back and look at it from the doorway before you commit. The headboard should be centered on the bed, not necessarily on the wall, especially if the bed sits off-center.
See the tutorial on A Beautiful Mess
21. A peach painted half-circle headboard
Level: Easy | Time: 3–4 hours | Budget: $35–55 | Materials: Wall paint, brushes, string, pencil, painter’s tape

21. A peach painted dome rises behind a mustard throw © The June Motel
This painted half circle completely changes the feel of a bedroom. You trace the curve on the wall with a pencil tied to a string, then fill it with a warm peach paint. Its rounded shape suits modern and boho spaces, and it’s an easy, very on-trend first DIY project.
Mark the center point at mattress height, keep the string taut as you trace, and outline the edge with a small brush before rolling in the rest so the curve stays crisp.
See the tutorial on The June Motel
22. An ombre painted headboard
Level: Intermediate | Time: 1 weekend | Budget: $35–55 | Materials: Acrylic paint, brushes, sponge, painter’s tape

22. Planks painted in an ombre from deep turquoise to almost white © Je Décore
This ombre headboard creates a sophisticated gradient, fading from deep turquoise to almost white. Blending the colors takes a little patience but is doable with the right technique, and the soft, watery effect works with every style, from coastal and modern to boho.
For a smooth gradient, work on one section at a time while the paint is still wet, blending the colors with a dry brush or a damp sponge in light, overlapping strokes. Choose shades from the same paint strip so the transition looks natural.
23. A painted half-circle headboard
Level: Easy | Time: 2–3 hours | Budget: $15–30 | Materials: Wall paint, brush, ruler, string, pencil

23. A blush circle painted behind a daybed, with a rattan chair nearby © Lucie Rose
This project paints a headboard directly onto the wall with an elegant circular shape. You trace a perfect half-circle with a string and pencil, then paint it in to frame the bed. The result is modern and graphic without cluttering the room, ideal for small bedrooms and any contemporary style.
A painted arch or circle is especially effective in a bedroom with low ceilings or no architectural features, since it creates a focal point and frames the bed without taking up any floor space.
See the tutorial on Lucie Rose
If you’re not sure where to start, choose based on your time and skills. Paper and paint projects can usually be finished in a day, including drying time. Fabric headboards typically take a weekend, especially if you sew a cover, and wood projects range from an afternoon to a full weekend depending on the cuts and finishing involved. Whatever you choose, a handmade headboard is one of the most satisfying projects you can do for your bedroom, and you’ll enjoy it every single night.
Frequently asked questions
How tall should a DIY headboard be?
Most headboards sit roughly 36–51 inches (90–130 cm) from the floor for a standard bed, and can go up to about 59 inches (150 cm) for a king. What matters most is that it clears your pillows comfortably and stays in proportion with the room and ceiling height.
How can I attach a headboard without drilling into the wall?
You can bolt it to the bed frame, build a freestanding headboard with legs, or wedge it between the bed and the wall. Painted and wallpaper headboards need no hardware at all, and lightweight paper designs can go up with removable tape. These options are ideal for renters.
What is the easiest DIY headboard for beginners?
Painted headboards, wallpaper and wall decals are the easiest place to start: they need few tools and help you get a feel for proportions. A simple frame covered in stretched fabric, or a cushion headboard like the IKEA hack, is a good next step.
How do you clean a fabric headboard?
Removable covers can go in the washer according to the fabric’s care label. For fixed upholstery, vacuum regularly with a brush attachment and spot-clean stains. Delicate fabrics like velvet are safest with professional cleaning, and a fabric protector spray applied beforehand makes upkeep easier.
How long does it take to make a headboard?
Paper and painted headboards can usually be done in a day, drying included. Upholstered headboards take about a weekend depending on the padding, and wood headboards can take 2–3 days for cutting, assembly and finishing. Planning and prep often take up about half the total time.