A well-organized desk completely changes how it feels to work and gives your productivity a real boost. These DIY desk organization projects help you store things efficiently while adding a one-of-a-kind decorative touch, from wall pockets and pegboards to pencil holders and letter racks. Getting your desk organized is actually fun when you can make custom solutions that fit exactly what you need, in the colors and materials that match your room. The result: a functional space that inspires and motivates you every time you sit down.
These 16 projects cover every angle, from vertical storage to small, clever fixes that make the most of every inch, and they work in modern workspaces as well as more classic ones. The materials are easy to find, and some take less than an hour while others need a weekend. For more ideas, browse our home office decor section and our other DIY projects. Setting up a workspace from scratch? Don’t miss my small home office ideas and closet office ideas.
Contents
1. Sort first, then plan your storage
2. Wall organizer ideas that free up your desk
3. Clever tabletop organizers and cork boards for a tidy desk
Sort first, then plan your storage
Start by sorting what’s on your desk: daily essentials stay within arm’s reach, weekly items go on the wall or in a drawer, and the rest can be stored elsewhere. In a small space, vertical storage frees up the work surface; on a bigger desk, a few tabletop organizers create zones.
Wall organizer ideas that free up your desk
Walls offer huge storage potential without crowding your work surface. Keep the things you use most between shoulder and eye level, avoid the spot right behind your monitor, and use anchors suited to your wall type.
1. A fabric pocket wall organizer
Level: Easy | Time: 2–3 hours | Budget: $15–30 | Materials: Fabric, wood board, cord, scissors, stapler
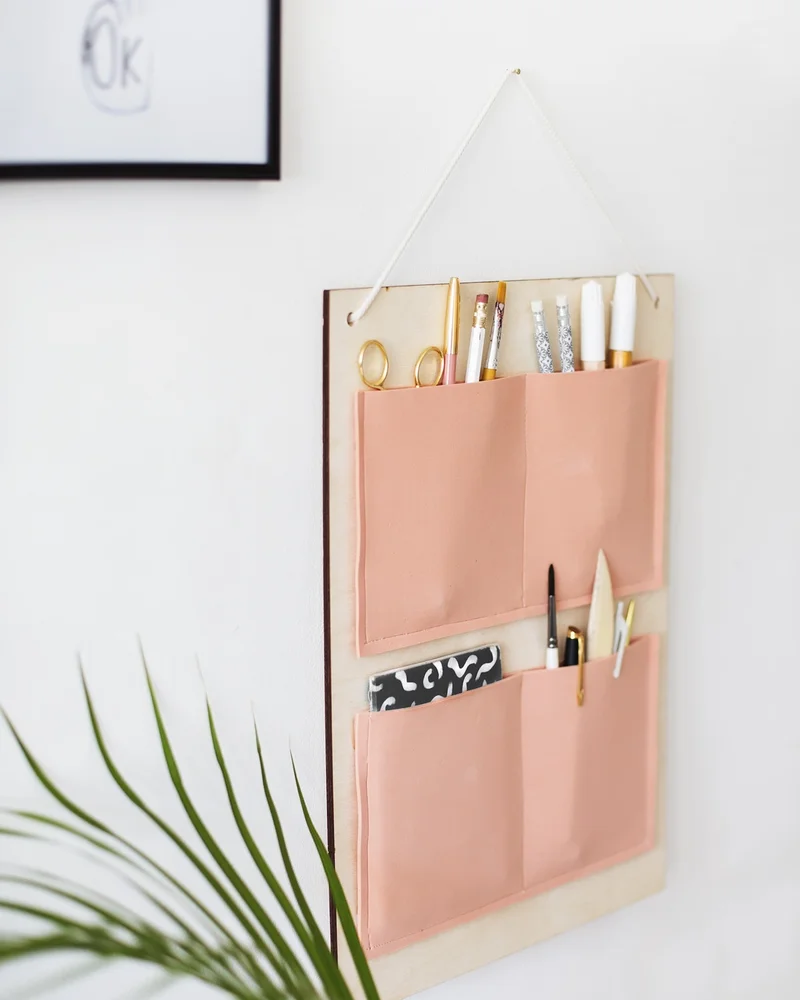
1. Blush pockets on a pale wood board hold pens, scissors and notes © The Lovely Drawer
This project turns a simple wood board into a handy wall organizer with blush fabric pockets. You stitch or attach several compartments to the backing and hang it from a cord for storage with a twist. It adds a modern boho touch to your desk area while freeing up your work surface, and it’s beginner-friendly with a neat finish.
Choose a sturdy cotton canvas, linen or faux leather for the pockets so they hold their shape, and hang the organizer on a solid nail or hook so it doesn’t slip as you add and remove pens, scissors and notebooks.
See the tutorial on The Lovely Drawer
2. A wood and cork hanging organizer
Level: Easy | Time: 2–3 hours | Budget: $15–30 | Materials: Wood board, cork sheet, hooks, screws, glue

2. A plywood hanger with a cork strip, pockets and a pair of scissors © Burkatron
This project cleverly combines wood and cork into a functional wall organizer. I love the idea because you can pin up notes and hang accessories on the built-in hooks. It brings a natural, orderly feel to your desk, and it’s easy even if you’re new to DIY.
Cork is a practical material for a home office: it’s lightweight, holds pins easily and can be cut with a craft knife. Seal raw cork edges with a little clear glue or tape to keep them from crumbling over time.
3. A modern white box wall organizer
Level: Easy | Time: 2–3 hours | Budget: $15–30 | Materials: Wood board, small boxes, white paint, screws, drill

3. Little white boxes on a white panel hold brushes, washi tape and tiny animals © Sinnenrausch
This project turns a simple board into a super practical wall organizer. Small white boxes are mounted on a wood backing to create storage compartments. The look is clean and fits perfectly in modern or Scandinavian decor, and you only need basic tools.
Matching boxes in the same color give a wall organizer a clean, calm look even when they’re full of odds and ends. Labeling them, whether with a label maker or small handwritten tags, makes it much easier to keep things in their place.
See the tutorial on Sinnenrausch
4. An OSB board desk organizer
Level: Easy | Time: 2–3 hours | Budget: $15–30 | Materials: OSB panel, wood strips, screws, hooks, paint

4. An OSB board dotted with cork hexagons and white pockets © Lili in Wonderland
This wall organizer turns a plain OSB panel into a stylish storage solution for your desk. You attach wood strips and hooks to the panel to create different storage zones. The raw, industrial look works well with modern or Scandinavian decor, and it’s an easy build with basic tools and a few hours of work.
OSB has a distinctive textured look that suits industrial and Scandinavian spaces. Sand the surface lightly and seal it with a clear matte finish so it’s easier to clean and doesn’t snag paper.
See the tutorial on Lili in Wonderland
5. A modular plywood wall organizer
Level: Intermediate | Time: 3–4 hours | Budget: $20–35 | Materials: Plywood, saw, drill, screws, paint, storage compartments

5. A plywood organizer with a mini chalkboard, ledges and a scissor hook © Poppytalk
This wall organizer turns a sheet of plywood into a modular storage system for your desk. You cut and assemble different compartments to create a setup that’s all yours. The result is clean and functional, perfect for a modern or Scandinavian look. It takes some cutting and assembly skills, but it’s doable with the right tools.
A modular design is ideal if your needs change over time. Plan a few extra holes or slots so you can move shelves, hooks and pockets around as your projects evolve, without having to rebuild the whole organizer.
6. A colorful wall organizer hack
Level: Easy | Time: 2–3 hours | Budget: $15–30 | Materials: Wood board, hooks, paint, screws, drill

6. Pink, cork and wood pockets scattered across a light board © Fish and Bull
This project turns a simple board into a practical, decorative wall organizer. You paint the backing in bright colors, then add storage pieces like hooks and small shelves. It brings a modern, organized touch that’s perfect for a desk or creative workspace. I find it very beginner-friendly thanks to its simple but effective design.
Bright colors can make a work area feel more energizing. To keep it from looking busy, limit yourself to two or three shades that repeat elsewhere in the room, like in a desk lamp, a chair cushion or a notebook.
See the tutorial on Fish and Bull
7. A canvas pocket wall organizer with hooks
Level: Easy | Time: 2–3 hours | Budget: $15–30 | Materials: Canvas fabric, wooden dowel, S-hooks, scissors, needle

7. A canvas panel of pockets and S-hooks above a desk and cane chair © Paper N Stitch Blog
This project turns a length of canvas into a modern wall organizer. Rows of sewn pockets hold papers and supplies, while metal S-hooks along the top rail carry scissors and small tools. It brings a relaxed boho, organized feel to your workspace, and beginners can easily pull it off.
Hang the canvas from a wooden dowel or rail so it stays flat, and vary the pocket depths to fit everything from pencils to envelopes.
See the tutorial on Paper N Stitch Blog
8. A white box desk organizer with a cork wall
Level: Easy | Time: 2–3 hours | Budget: $15–30 | Materials: White wooden box, dividers, cork sheet, glue, utility knife

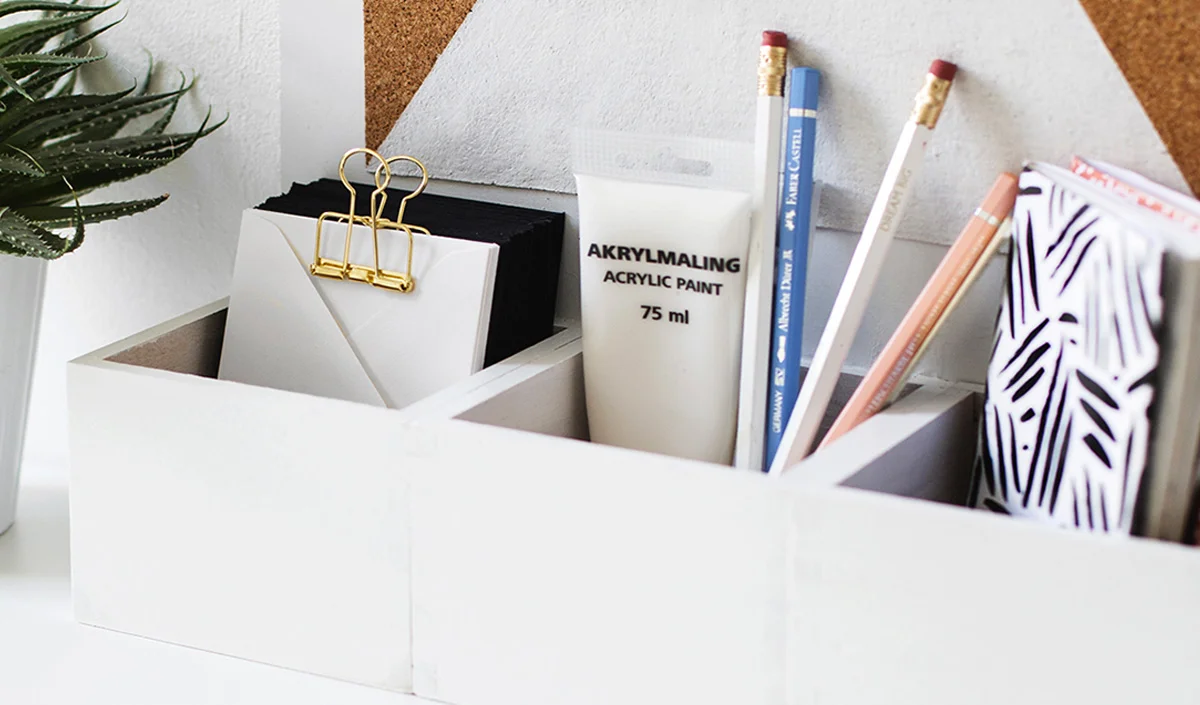
8. A divided white box of pencils and notebooks beneath a cork triangle © Sugar and Cloth
This project pairs a simple white wooden box with dividers and a cork board on the wall above it, so notes, pencils, paint tubes and notebooks all have a place. I especially like how it works in both modern and classic interiors. It’s beginner-friendly and adds real function and style to your workspace.
Cork can be cut into graphic shapes, like a triangle, before it goes on the wall, and covering it partly with paint or fabric is an easy way to coordinate the board with the rest of the room.
See the tutorial on Sugar and Cloth
Clever tabletop organizers and cork boards for a tidy desk
Beyond the wall, these projects tackle the little details that make all the difference: pens, paperwork and supplies. Many use offcuts and inexpensive materials, so they’re perfect for using up leftovers from bigger DIY projects.
9. A fish-scale cork board
Level: Easy | Time: 2–3 hours | Budget: $15–30 | Materials: Cork tiles, paint, craft knife, glue, mounting strips

9. Scalloped cork tiles in natural, mint and black form a fish-scale board © Jesus Sauvage
This wall panel turns any workspace into a stylish organizing zone. You cut cork tiles into scallop shapes and arrange them like fish scales, some left natural, others painted mint, black or white, to make a board that’s functional and decorative. It brings a modern, playful touch to a contemporary office, and it’s a great first decor DIY.
Cork tiles are easy to trim to size with a craft knife and a metal ruler. Mount the finished board with removable picture-hanging strips if you rent, or with screws and anchors for a heavier panel.
See the tutorial on Jesus Sauvage
10. A round DIY cork board
Level: Easy | Time: 2–3 hours | Budget: $15–30 | Materials: Wood circle, cork roll, glue, decorative fabric, push pins

10. Round cork and fabric boards hang above a plywood trestle desk © The Merrythought
This project makes an original round bulletin board for notes and inspiration. You cover a round base with cork, then wrap it in fabric that matches your decor. It adds a modern, functional touch to your office, and you can easily adapt the colors to your style. It’s still easy enough for beginners.
A round board is a nice way to soften a desk area full of straight lines from shelves, screens and file boxes. Hang it slightly off to one side for a more relaxed, gallery-style look.
See the tutorial on The Merrythought
11. A mountain desk organizer
Level: Easy | Time: 2–3 hours | Budget: $15–25 | Materials: Wood boards, saw, sandpaper, paint, glue
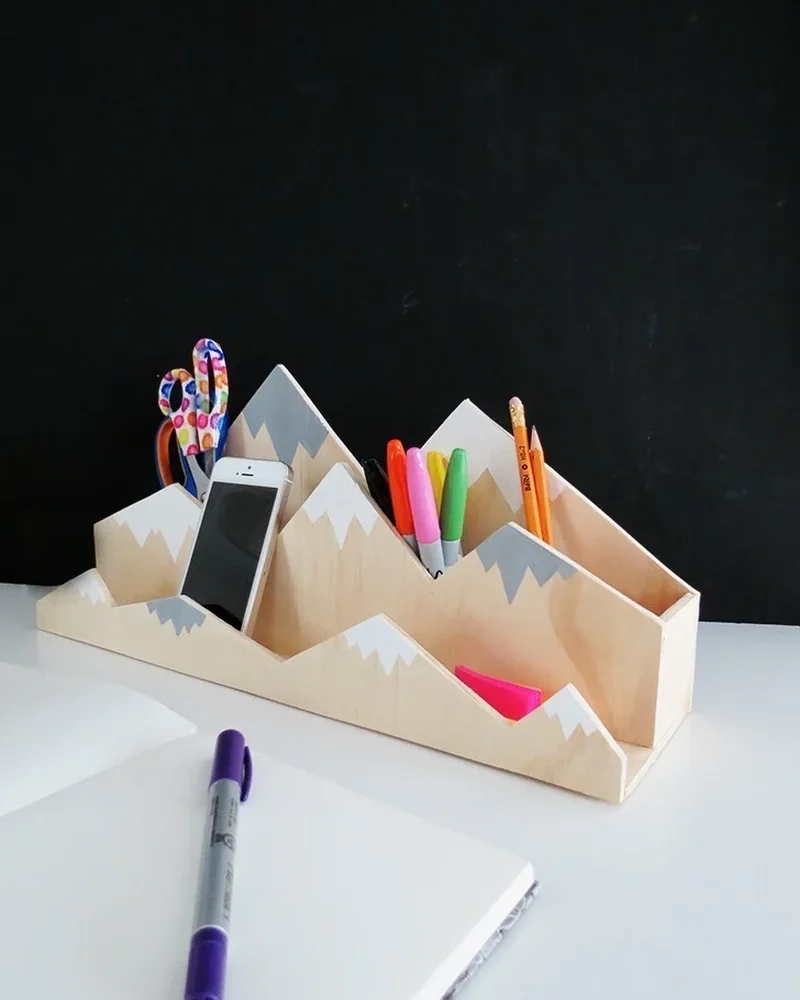
11. Snow-capped wooden peaks hold pens, markers and a phone © Dream a Little Bigger
This project turns plain wood boards into a desk organizer shaped like a mountain range. You cut triangles of different heights and join them to create a graphic skyline. It adds a modern, whimsical touch that’s perfect for a Scandinavian or minimalist workspace, and it only needs basic tools.
Wooden organizers like this one look best when the edges are sanded smooth and finished with a natural oil or a clear matte varnish. Add small felt pads to the bottom so they don’t scratch your desk.
See the tutorial on Dream a Little Bigger
12. A DIY file sorter
Level: Easy | Time: 2 hours | Budget: $15–30 | Materials: Cardboard, decorative paper, glue, utility knife, ruler

12. A tiered corner sorter for papers beneath a hanging plant © The Lovely Drawer
This homemade file sorter is a custom way to organize your paperwork. You cut and assemble cardboard to create several vertical compartments. Its clean lines suit modern and minimalist interiors, and I think it’s a great way to file papers while adding a unique decor touch to your workspace.
Cardboard file sorters can be surprisingly sturdy if you use thick corrugated cardboard and glue the joints carefully. Cover them with decorative paper or paint to match the rest of your desk, and apply a clear sealer for extra durability.
See the tutorial on The Lovely Drawer
13. Gold-striped file folders painted with tape
Level: Easy | Time: 30 minutes | Budget: $10–20 | Materials: Card stock file folders, gold paint, brush, painter’s tape

13. Painted gold stripes on a white envelope folder © Home Yoh My
This project turns plain file folders into elegant gold-striped document holders. You use painter’s tape and gold paint to create a modern graphic stripe. It adds a sophisticated touch to your desk while staying practical, an easy DIY that makes storage look stylish.
Press the painter’s tape down firmly along the edges before painting, and peel it off while the paint is still slightly wet for crisp, clean lines. Metallic paint pens are a handy alternative for thinner details.
See the tutorial on Home Yoh My
14. A modern wood desk caddy
Level: Easy | Time: 2–3 hours | Budget: $15–30 | Materials: Wood boards, wood glue, screws, paint or varnish, sandpaper
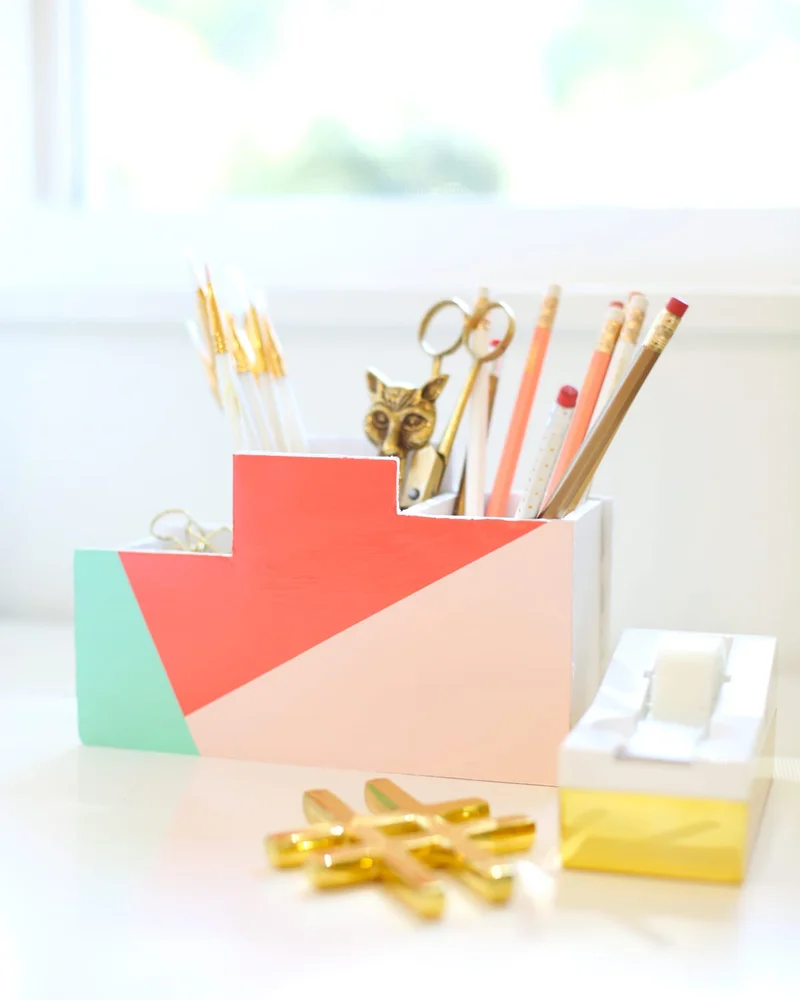
14. Color-blocked coral, mint and blush on a stepped pencil holder © Lovely Indeed
This project creates a custom desk organizer with compartments for pencils, pens and supplies. It uses simple woodworking joints that are perfect for beginners. The clean design works with every style, from Scandinavian to modern. I love that it’s practical while adding a handmade touch to your workspace. For more ideas, check out my wood decor roundup.
Measure your favorite pens, scissors, rulers and sticky notes before you build, so each compartment is sized for what it will actually hold. A shallow tray section is handy for paper clips and small items that tend to get lost.
See the tutorial on Lovely Indeed
15. A wood and brass letter holder
Level: Intermediate | Time: 2–3 hours | Budget: $15–30 | Materials: Wood board, brass rod, screws, drill, saw

15. Brass arches set in a blush block keep letters upright © A Beautiful Mess
This letter holder pairs natural wood with gold-toned brass for a sophisticated desk accessory. The minimalist design shows off the raw materials while giving you a practical place to sort papers. I think it fits beautifully in modern or industrial decor. Working with metal takes a bit of precision, but it’s manageable with the right tools.
Brass rods and tubes can be found at hardware and hobby stores. Cut them with a tube cutter or a fine-toothed hacksaw, and file the ends smooth so they won’t scratch your hands or your mail.
See the tutorial on A Beautiful Mess
16. A tabletop wood desk organizer
Level: Intermediate | Time: 3–4 hours | Budget: $15–30 | Materials: Wood boards, saw, wood glue, sandpaper, varnish or stain

16. A long wood caddy with black trim corrals pens and a phone © Curbly
This wood desk organizer is a practical, good-looking way to store pens, stationery and accessories. You cut and assemble compartments sized to your needs. The finished piece fits right into a modern or Scandinavian setup, and it’s a great way to personalize your workspace with something one of a kind.
The secret to a desk that stays tidy is giving everything a home and taking two minutes at the end of each day to put things back. With a few handmade organizers designed around how you work, that little habit becomes much easier, and your workspace becomes a place you actually enjoy sitting down at every morning.
Frequently asked questions
What is the best material for DIY desk organizers?
Wood is the most versatile choice for sturdy, good-looking organizers, while metal adds an industrial touch and is very durable. Sturdy cardboard is great for testing a layout before investing in pricier materials. Choose based on how you’ll use the organizer and the style of your space.
How do I organize a small desk with no storage?
Go vertical: wall organizers, pegboards and hanging pockets use height without taking up desk space. Modular pieces let you combine several compact elements to fit tight spots. Favor hanging and 2-in-1 storage, and keep only daily essentials on the desktop.
Do I need woodworking skills to make a desk organizer?
Not for most of these projects. Basic tools like a drill, a saw, strong glue and a few screws are usually enough, and the techniques are easy to learn. Start with the simplest projects to build confidence before tackling the more technical builds.
How can I make a desk organizer match my decor?
Paint is the easiest way to adapt any project to your style. Finishes make a big difference: a matte clear coat for a Scandinavian look, a distressed finish for vintage, bold colors for a modern office. Small details like labels, pulls or rope handles help fine-tune the look.
How long does it take to make a DIY desk organizer?
The simplest projects take 30 minutes to two hours, perfect for a creative afternoon. More involved wall organizers can take a full weekend once you include drying time. Plan a little extra time for finishing, and remember you can often work in stages.